
Last updated November 18, 2026
 Hardwood
 Engineered hardwood
 Luxury vinyl plank
 Laminate
 Porcelain tile
 Carpet
 Shaw
 Mohawk
 COREtec
 Pergo
Free in-home measure and written estimate: Shaw, Mohawk, COREtec and Pergo lines compared on your own rooms, with carpet, tile, vinyl plank, laminate and hardwood laid out side by side
Get your free estimateHow to Prepare Your Home for a Flooring Installation in Whitney
Most delays and surprise charges on installation day are set in motion weeks before anyone lifts a pry bar, and they almost never trace back to the installer. They come from a room that wasn’t actually ready. The single most common day-of charge in flooring work is furniture moving, which plenty of homeowners reasonably assume is included and which most standard scopes leave out. The second most common is a surprise under the surface: a soft spot, a squeak, a ridge of old adhesive nobody flagged. This guide walks through exactly what needs to happen before the crew pulls up in Whitney, from clearing the room to timing the painter to letting a Mohawk plank settle in our dry air. Read it end to end and your install day gets simpler.
Quick Answer
Getting a Whitney home ready for flooring installation means three things happen before the crew arrives: the room is completely cleared of furniture and personal items, the new material has been on site and acclimated to the home’s conditions, and any existing subfloor problems have been identified and disclosed. Handle those three, and the rest of the job – painting order, appliance timing, baseboard removal – is scheduling. Our technicians have up to 12 years of experience, and every one of them will tell you the same thing: a well-prepped room installs cleaner and faster than a rushed one.
Styles & brands we work with
- Hardwood
- Engineered hardwood
- Luxury vinyl plank
- Laminate
- Porcelain tile
- Carpet
- Shaw
- Mohawk
- COREtec
- Pergo
Table of Contents
- Room Clearing: What Moves, What Stays, What Crews Won’t Touch
- Material Acclimation in Whitney’s Dry Climate
- Subfloor Access and Disclosing What’s Underneath
- HVAC and Humidity: Getting the House to Living Temperature
- Coordinating With Painters, Baseboards, and Appliances
- What Install Day Actually Looks Like
- Setting Realistic Expectations for Time and Disruption
- Common Mistakes to Avoid
Room Clearing: What Moves, What Stays, What Crews Won’t Touch
Empty means empty. A room is ready for installation when the floor is the only thing left in it. That sounds obvious until you’re standing in a bedroom at seven in the morning deciding what to do with a dresser that weighs more than you do. Start clearing the room at least a few days before install day, not the night before.
Here’s the working checklist we hand to Whitney homeowners before every Whitney Flooring installation:
- Everything off the floor. Furniture, rugs, floor lamps, plants, fans, pet bowls, area rugs and rug pads, storage bins, exercise equipment, and anything else resting on the surface being replaced.
- Everything off the walls that could be disturbed. Wall art, mirrors, shelves, and anything hanging within a few feet of the work zone. Vibration travels further than people expect.
- Closets emptied. If a closet floor is part of the job, the contents come out entirely – boxes, hanging clothes, shelving units. Crews need to stand where the contents were.
- Electronics and small valuables removed from the room and stored somewhere the work won’t reach. That includes TVs, computers, game consoles, and anything with a screen or a cord.
- Pets relocated for the day to a closed room or off-site. Doors get propped open, thresholds get crossed, and a curious cat in a room full of tack strip is a bad combination.
What can often stay? Large appliances in kitchens – a refrigerator, range, or dishwasher – can sometimes remain depending on the scope, but ask before install day. In most cases the fridge needs to come out if the floor runs under it, and that’s a conversation to have during the estimate, not the morning of. Heavy safes, pianos, and aquariums are the three items most residential crews won’t move. Those need a specialty mover lined up in advance. Furniture moving itself is often quoted separately, so confirm what’s included in your written estimate before the crew arrives. If it’s not in the scope, it’s not in the price.
Material Acclimation in Whitney’s Dry Climate
New flooring has to settle into your home’s conditions before it gets installed, and Whitney’s climate makes this matter more than it would in a humid city. The desert air here is dry year-round, with summer heat that pulls moisture out of spaces fast and winter nights that swing temperatures by twenty degrees or more. Material that’s spent a week in a warehouse or a delivery truck hasn’t felt any of that. It needs time in your house, at your house’s temperature, before it goes down.
Different products settle differently. Here’s the general pattern, but always follow the product manufacturer’s instructions and the timeline written on your estimate – those set the actual number for your job:
- Luxury vinyl plank and rigid-core products like COREtec and LifeProof are the most forgiving. They typically need a shorter acclimation window, but they still need to be unboxed and laid flat in the room where they’ll be installed so they can come to room temperature. In a Whitney summer, a garage that hits 110 degrees is not an acclimation space.
- Hardwood is the most sensitive to moisture content. Solid and engineered hardwood both want to sit in the conditioned space for a set period, and Whitney’s dry air can cause boards to shrink if they acclimate in a room that’s drier than the living space. This is why the HVAC conversation below matters as much as the timeline.
- Carpet needs less time – it wants to be relaxed and at room temperature – but rolls of carpet stored flat in a cold garage will show creases that take time to work out. Have carpet delivered into the home a day before install if space allows. Our carpet installation team will tell you exactly where to stage it.
- Tile is the least sensitive to humidity but should still be stored in the conditioned home rather than outside, since temperature extremes can affect setting materials. Daltile products ship flat and stable, but the boxes should be inside, not on a patio.
One thing to plan for: staging material takes floor space. A whole-home install means boxes and rolls stacked in a hallway or a spare room for days. If you don’t have a spare room, tell us at the estimate and we’ll plan the staging area with you. It’s a scheduling problem, not a problem, as long as it’s handled before delivery day. If you want to research a product’s exact acclimation requirement before you order, look up the manufacturer’s installation instructions – Mohawk, Pergo, COREtec, and LifeProof all publish them, and matching what you find to what’s written on your estimate is the safest path.
Subfloor Access and Disclosing What’s Underneath
The floor you see is a thin layer on top of everything that decides whether the new one lasts. Subfloor problems – squeaks, soft spots, unevenness, old adhesive residue, moisture damage – need to be found before the new material goes down, not after. Once the new floor is glued, stapled, or floated, fixing what’s underneath means pulling it back up.
You don’t need to diagnose anything yourself. What you do need to do is walk the room before the estimate and note anything you’ve noticed. A short list is worth more than a long inspection:
- Squeaks and creaks. Walk every square foot of the room in shoes and note where the floor complains. Squeaks usually mean a loose fastener or a gap between subfloor and joist.
- Soft spots. Press down with your foot in the middle of the room. If the floor gives, even slightly, mark it. Soft spots matter.
- Visible damage. Water stains, pet stains, dark spots on wood subfloor, or bubbling in a vinyl or laminate surface that’s being replaced. All of these suggest moisture got in.
- Old adhesive or residue. If you’re replacing tile, vinyl, or glued-down carpet, the old adhesive may need to be removed or encapsulated before the new product goes down. This is often a separate line item.
- Previous repairs. If a plumber cut through the floor to reach a drain, or a previous owner patched something, say so. The crew needs to know where to look.
- Concrete condition. If you’re on a slab – common in Whitney – note any cracks and where they run. Some cracks are cosmetic, some are structural, and the difference is a job-site call, not a homeowner call.
Tell us all of this at the estimate, not on install day. The written estimate is where these conditions get priced. If a subfloor repair is needed, it needs to be in scope, and any flooring company in Whitney that doesn’t ask you about existing conditions before quoting is quoting toward a surprise. A free estimate is exactly the moment to be honest about what’s under the floor. Our team would rather see a soft spot in the estimate than discover it under a new COREtec plank.
HVAC and Humidity: Getting the House to Living Temperature
Flooring materials behave best in the conditions where they’ll live. That means your Whitney home should be at normal living temperature – not a construction site’s cold shell, not a house that’s been shut up for three weeks – for several days before installation and throughout the install itself.
In practical terms:
- Turn the HVAC on before acclimation starts. If the material is arriving a few days ahead, the home should be running at its normal temperature and humidity from the day the material arrives, not the day of installation.
- Keep it running during install. Crews work with doors opening and closing all day, which can swing interior conditions quickly. Leave the HVAC running throughout, and don’t shut it off to “save energy” during the job.
- Watch for extreme humidity. Whitney is dry, but monsoon season still brings short bursts of humidity. If the forecast calls for rain during your install, mention it. Adhesives and hardwood both behave better when the interior stays stable.
- Don’t run a swamp cooler at full blast during the job. Evaporative cooling adds a lot of humidity to the air, and flooring materials that acclimated in dry conditions don’t love a sudden moisture spike. If you use one, the estimate visit is the moment to bring it up so the crew can plan around it.
- Check doors and thresholds. After installation, a home that’s stayed at stable temperature won’t fight the new floor at doorways. A home that’s been left hot or cold during install can cause gaps and binding later, and fixing that is a follow-up call nobody wants.
This isn’t overthinking. In our experience, installs that go sideways are almost always installs where the conditions in the home changed dramatically during the job. For our tile flooring installation work, setting materials also need stable temperature to cure correctly. If your home has a thermostat you haven’t touched all winter, set it before the material arrives and leave it set.
Coordinating With Painters, Baseboards, and Appliances
Sequencing is where a simple flooring job turns into a two-week relay race. Get the order right and everything happens once. Get it wrong and you’re paying someone to do something twice.
Here’s the order that works for most Whitney homes:
- Painting comes first. Ceiling, walls, trim paint, and any drywall work should be finished before flooring. Paint drips and drywall dust ruin a new floor, and painters like to work with an empty room and a floor that won’t mind getting speckled. If painting is happening after flooring for some reason, the floor needs to be covered – and covering a new floor during painting is a cost, both ways.
- Flooring comes next. With the room empty and freshly painted (or at least painted in the areas that will be hard to reach once the floor is in), the flooring can go down without the risk of paint reaching it.
- Baseboards and shoe molding after flooring. Baseboards come off before install and go back on after. New baseboard, new shoe molding, and any trim work happens after the floor is done, so the trim can sit on top of the new surface. If your painters want to install baseboard, coordinate the date with flooring. Nobody installs baseboard before the floor is in unless they want to pull it back up.
- Appliances last. In kitchens, the refrigerator, range, and dishwasher need to come out before install and go back after the flooring is finished and any adhesive has set. Confirm hookup dates with whoever is moving and reconnecting appliances. In many Whitney homes the fridge needs to be out of the room for the whole job, so plan meals accordingly.
- Final touches last. Hardware, furniture, area rugs, and wall hangings go back after cure time and any touch-up cleaning. Manufacturers set a cure time for their products – that’s in the instructions, and it’s written on your estimate.
If a contractor is coordinating other trades – a kitchen remodel, a bathroom update – tell the flooring company that at the estimate so the schedule can be built around it. One company handling carpet, tile, and hardwood means a mixed-floor home moves through those trades with a single point of contact. That’s a genuine advantage to keeping all the flooring under one specialist rather than splitting it across three different crews.
What Install Day Actually Looks Like
Understanding the shape of the day makes it less stressful. Install days vary by material and by the size of the job, but the general rhythm is predictable.
Before the crew arrives: The room is empty, the material has been acclimating, and pets and people are out of the work zone. Confirm the front door or the most direct path to the room is clear – crews carry material in through that path, sometimes for hours. If you have stairs inside the entrance, mention it, because the path determines how the day is staffed and scheduled.
When the crew arrives: The first thing a good crew does is confirm the material on site matches the order and walk the room with the homeowner. This is the moment to point out the soft spot, the old adhesive, or the squeak you noted. Any change from the written estimate gets discussed before work begins, not after.
During installation: The old floor comes up, the subfloor gets checked and prepped, then the new floor goes down. Carpet involves stretching and seaming. Tile involves setting and grouting, with curing time between stages. Hardwood involves nailing or gluing, and if you’re refinishing, that’s a longer process with sanding stages. Expect noise, some dust control, and foot traffic in and out of the front door. Kitchens and bathrooms in adjacent rooms may not be accessible for parts of the day.
At the end of the job: Crews walk the finished floor with you, point out anything that needs to be noted, and confirm any remaining steps – like trim work or cure time. Don’t move furniture back until the crew confirms the installer says it’s fine, and don’t assume it’s the next day. The manufacturer’s instructions and the estimate tell you when. If you’re not sure, ask before the crew leaves.
If you’re refinishing hardwood instead of replacing it, the shape of the day changes. Our Whitney refinishing team runs through several stages of sanding and finishing, and the house needs to be livable throughout, which means coordinating traffic patterns and cure time carefully. That’s a conversation worth having at the estimate.
Setting Realistic Expectations for Time and Disruption
Most of the stress around a flooring job comes from a mismatch between what homeowners expect and what the work actually looks like. Here’s how to set those expectations honestly.
- Your home will be disrupted. Not catastrophically. But a room being out of commission for a few days is normal, and access to adjacent rooms changes hour to hour. Plan where the contents of the working room will live and where meals will happen if a kitchen is involved.
- The timeline is set at the estimate, not at the door. We schedule the job based on what we see and what the material requires. Timeline depends on the size of the room, the material, the condition of the subfloor, and any trades coordinating. Don’t plan the job around an outside guess – use the written estimate.
- Dust happens. Crews work to control it, but any removal job generates dust. Covering nearby items and closing adjacent doors helps. If dust is a serious concern, mention it at the estimate so the crew can plan extra containment.
- Old flooring has to go somewhere. Removal and disposal is part of the job, but it means the old material – and the dust and debris that comes with removal – is in your home for a period before it’s hauled away. That’s a normal part of the process.
- Cure time is real. The new floor isn’t fully settle-ready the moment it’s installed. Tile grout, adhesives, and finishes need time before heavy use, and the manufacturer’s instructions set that time. Don’t push it.
A job that feels like a disruption for a few days produces a floor that’s worth the disruption for the next twenty. That’s the tradeoff, and knowing it in advance takes the sharp edge off.
Common Mistakes to Avoid
- Waiting until the night before to clear the room. Furniture and personal items always take longer to clear than people think, especially in closets, and any item left in the room on install morning can push the start of work back. Clear it days ahead.
- Assuming furniture moving is included. It’s often a separate line item. Confirm it in the written estimate, and line up a specialty mover for anything that weighs over what two people can safely lift – safes, pianos, and large aquariums are the usual culprits.
- Letting the material acclimate in the garage. Whitney garages hit temperatures that condition material in ways that don’t match the living space. Acclimate inside the conditioned house, in the room where the floor will live.
- Skipping the subfloor disclosure. A soft spot you noticed and didn’t mention becomes a surprise on install day, and a surprise on install day means work stops while the crew re-scopes. Be honest at the estimate, even about problems that make the job bigger.
- Painting after flooring. Paint over new flooring is a cost, either in covering the floor or in the cleanup. Get the painting done first.
- Pulling baseboards after the floor goes down. Trim installs over the new floor. If your trim is getting replaced, do it after, not before.
- Not telling the company about a swamp cooler, a pet, or a humidity-sensitive item. All three affect how the install is planned. Small facts, big difference.
See the difference
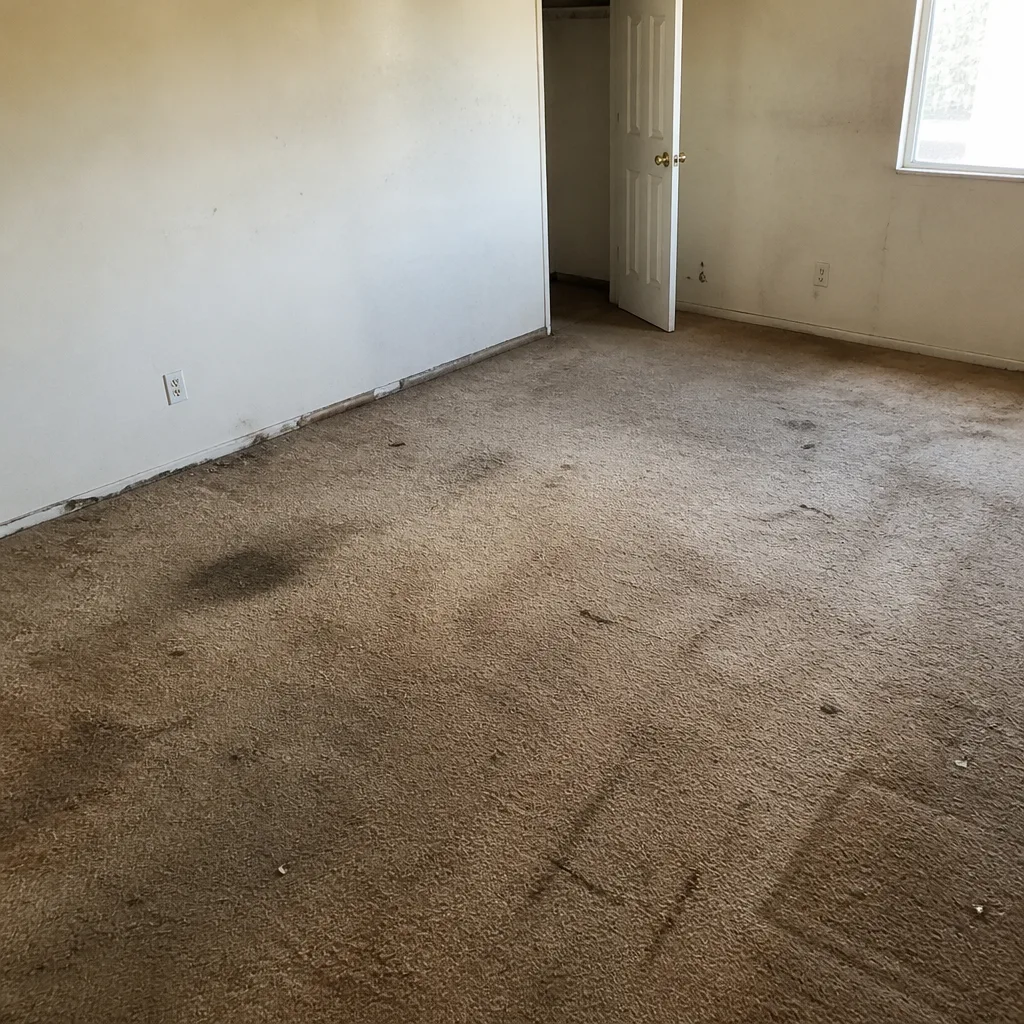 Before
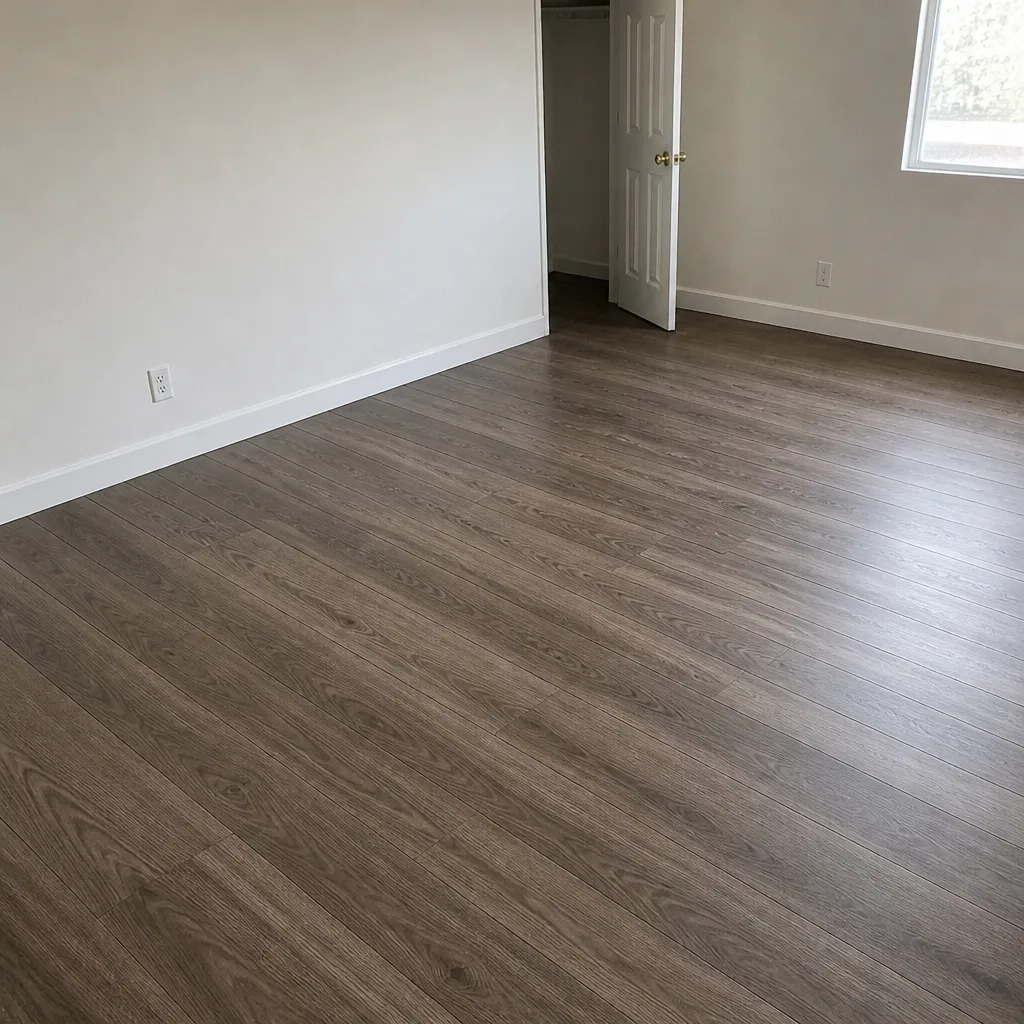 After
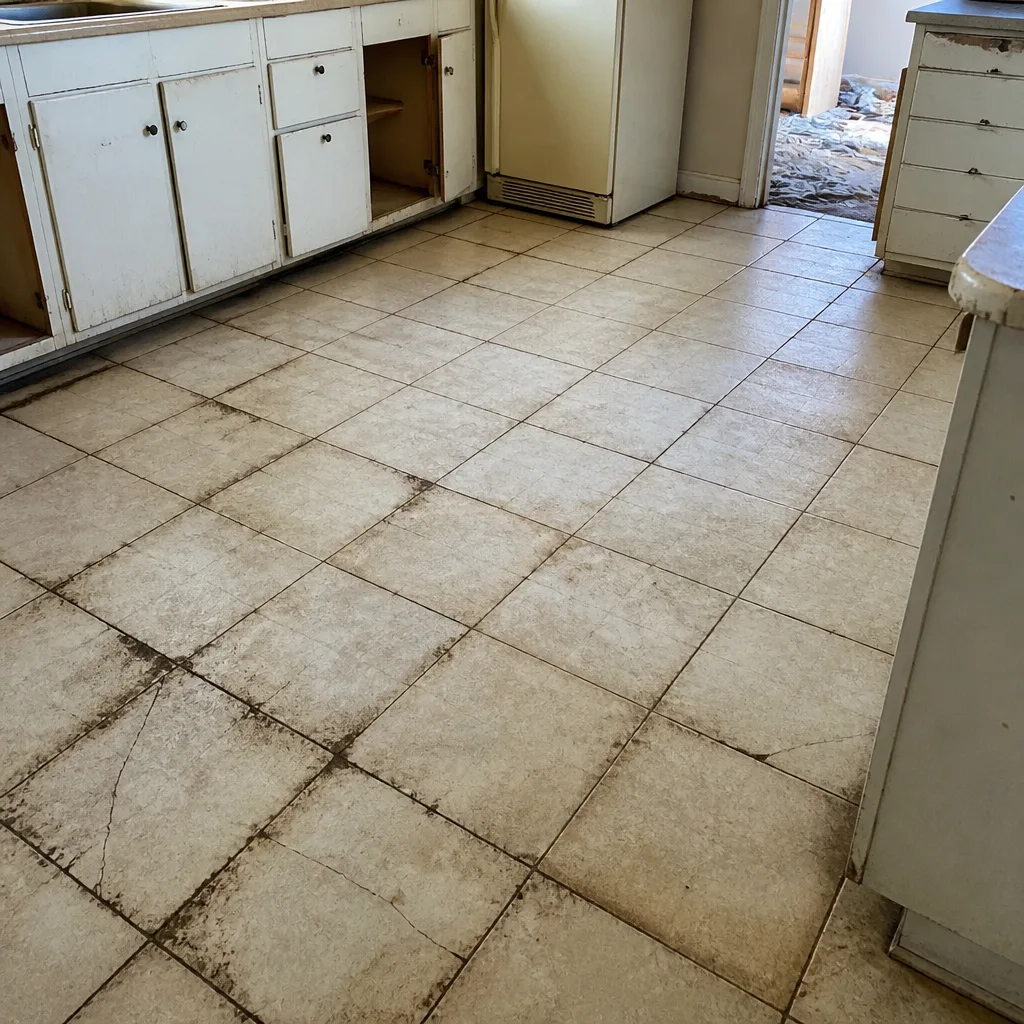 Before
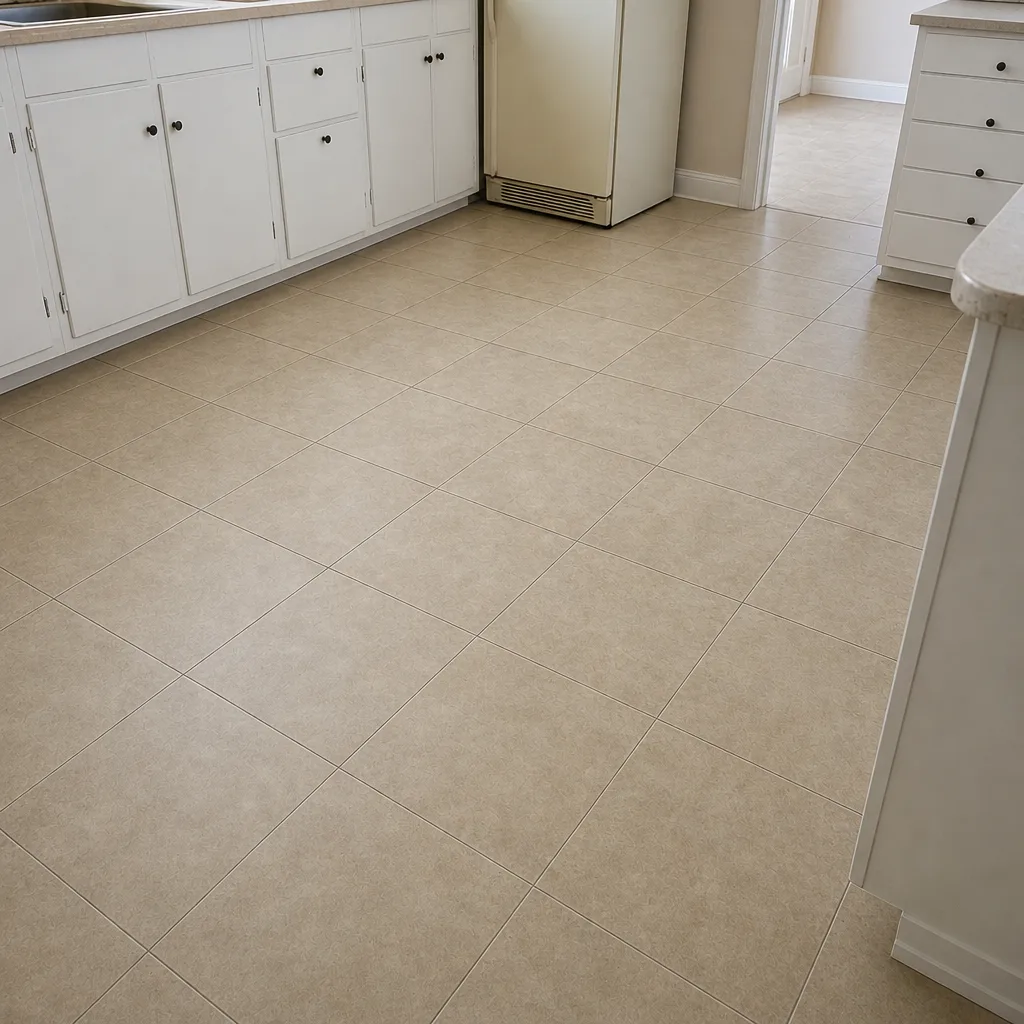 After
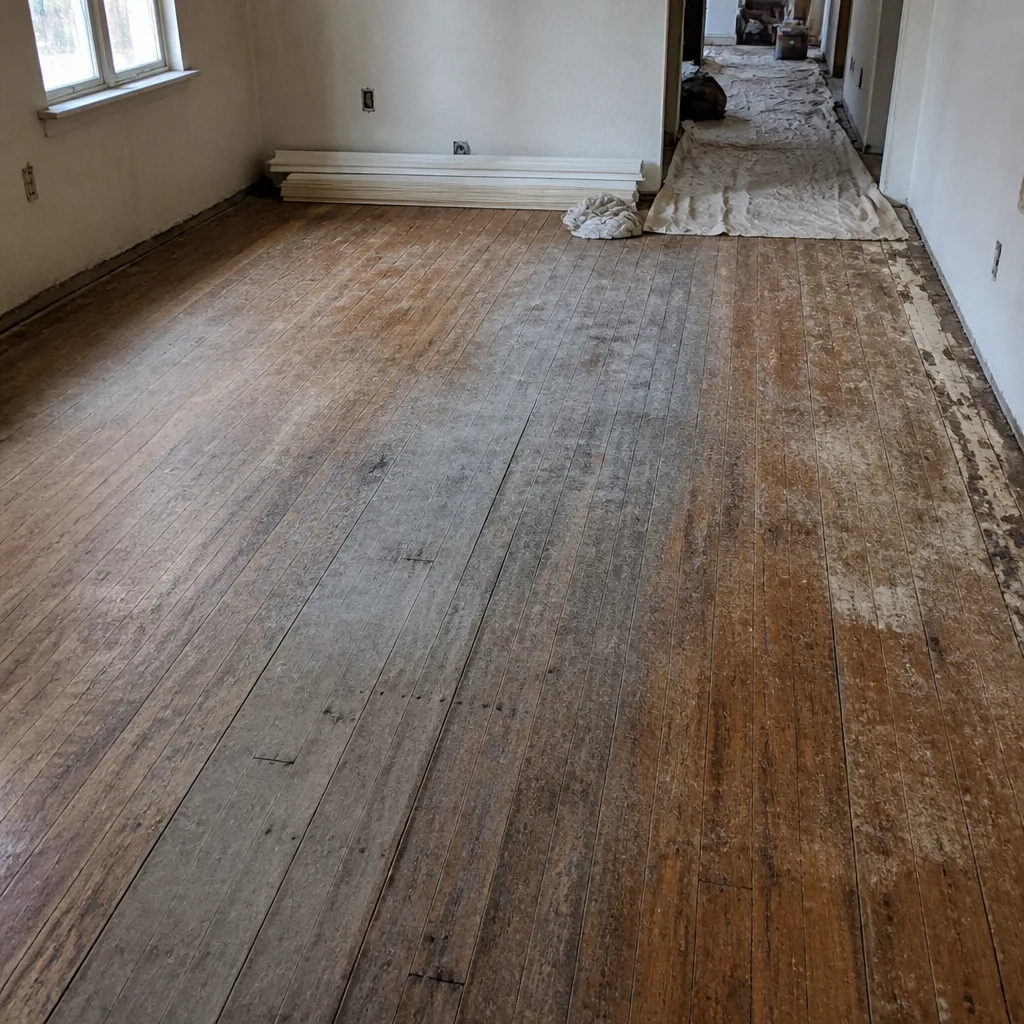 Before
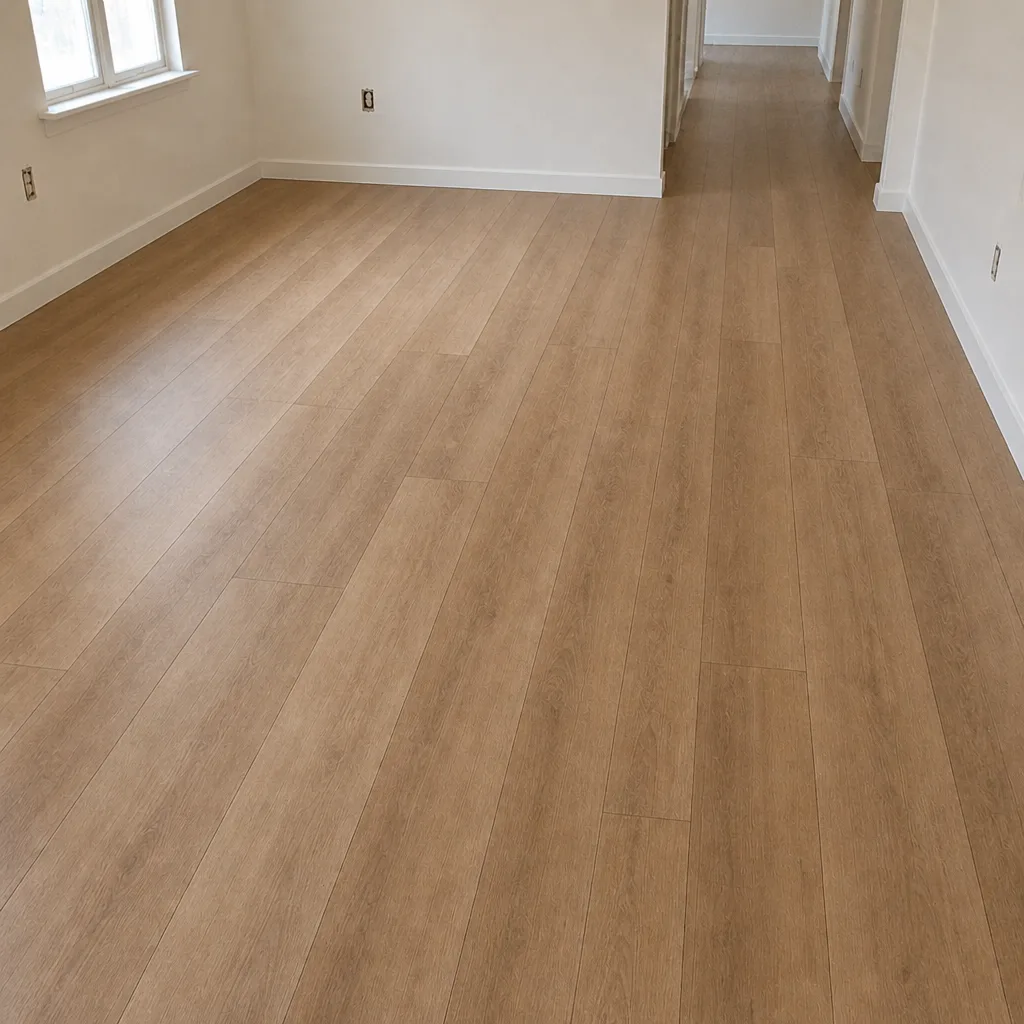 After
When to Call a Professional
Some parts of a flooring job are homeowner tasks – clearing a room, moving furniture, keeping the HVAC running, painting the walls. Others are not. If the subfloor is soft, if a previous installer glued a floor down badly, if you’re refinishing hardwood, or if you’re working with tile, a professional is the right call. Tile setting and grout work, hardwood sanding and finishing, and any subfloor repair involving moisture are all work where a mistake is expensive to correct and where the proper tools make the difference. Refinishing is our core expertise for exactly that reason – it extends the life of existing floors and often costs less than replacement, but it has to be done right. Whitney Flooring offers free estimates in Whitney – call (833) 620-5226 to schedule yours. We answer 24/7. Fast dispatch from 7am to 7pm, Sunday through Friday.
Frequently Asked Questions
Flooring installation in Whitney is priced per job based on the material, square footage, subfloor condition, and any extras like furniture moving or trim removal. Because those factors vary so widely from home to home, we quote each project with a written estimate rather than a price list. The written estimate sets the final price, and the estimate visit itself is free. Call (833) 620-5226 to schedule yours – we answer 24/7, with fast dispatch from 7am to 7pm, Sunday through Friday.
The acclimation window depends on the product – luxury vinyl plank, hardwood, tile, and carpet all have different requirements, and Whitney’s dry air affects the timeline. The manufacturer’s instructions set the exact number for your product, and the estimate visit is where we confirm it for your home. Plan on material arriving several days ahead of install day, in the conditioned house, with the HVAC running from the day it arrives.
Some furniture can usually stay if it’s a fixture the job doesn’t require moving, but most furniture needs to come out before install day, and furniture moving is often a separate line item on the estimate. Anything too heavy for two people – safes, pianos, large aquariums – needs a specialty mover lined up in advance. Confirm what’s included in your written quote before the crew arrives.
Paint before the flooring goes in. Painters work best with an empty room and a floor that won’t mind getting speckled, and it eliminates the cost of covering new flooring during painting. Baseboards and shoe molding install after the floor, sitting on top of the new surface. If your painting and flooring dates are close, tell us at the estimate so we can sequence the work.
Leave it running at normal living temperature from the day the material arrives through the end of the install. Whitney’s dry air plus summer heat swings mean flooring materials settle best in a home that’s been stable for days. If you use an evaporative cooler, mention it at the estimate so we can plan for the added humidity. Don’t shut the HVAC off to save energy during the job.
Yes, in most cases. The work happens in one room or a defined area, and the goal is to keep the rest of the home livable. Expect noise, some dust, and blocked access to nearby rooms for parts of the day. If the job is a whole-home installation or a hardwood refinish, traffic and cure-time planning matter more, so bring that up at the estimate.
The Bottom Line
Preparing a Whitney home for flooring installation isn’t complicated, but it needs to happen on time and in the right order. Clear the room fully, get the material acclimating in the conditioned house days ahead, walk the floor and disclose what you find to the crew at the estimate, keep the HVAC running, and sequence painting, baseboards, and appliances around the install. Do those five things and the job runs on the schedule written on your estimate. It’s the difference between a floor that goes in cleanly and a floor that comes with a stack of day-of adjustments nobody wanted. For carpet, tile, or hardwood refinishing, call (833) 620-5226 to schedule a free estimate – our technicians have up to 12 years of experience, and the estimate helps you see the whole job before you commit to any of it.
Written by the team at Whitney Flooring.